Lightroom presets are the game-changing tool that can transform hours of photo editing into minutes while maintaining professional consistency across your entire portfolio. Whether you’re a wedding photographer processing hundreds of images, a content creator maintaining brand aesthetics, or an enthusiast looking to streamline your workflow, mastering preset application is essential for efficient photo editing.
Understanding Lightroom Presets: The Foundation
What Are Lightroom Presets?
Lightroom presets are pre-configured adjustment settings that apply specific edits to your photos with a single click. Think of them as saved recipes for photo editing – they store combinations of exposure adjustments, color grading, tone curves, lens corrections, and virtually any other development setting available in Lightroom’s extensive editing toolkit.
The Technical Architecture Behind Presets
When you apply a preset, Lightroom executes a series of non-destructive adjustments stored in XMP metadata format. These adjustments can include:
- Basic Panel Settings: Exposure, contrast, highlights, shadows, whites, blacks
- Tone Curve Adjustments: Point curves, parametric curves, RGB channel curves
- HSL/Color Grading: Hue, saturation, luminance for individual color ranges
- Split Toning: Highlight and shadow color grading
- Detail Settings: Sharpening, noise reduction, texture, clarity
- Lens Corrections: Profile corrections, chromatic aberration removal
- Effects: Post-crop vignetting, grain, dehaze
- Calibration: Process version, camera profile adjustments
Essential Tools and System Requirements
Software Requirements:
- Adobe Lightroom Classic (version 7.3 or later recommended)
- Adobe Lightroom CC (cloud-based version)
- Lightroom Mobile (iOS/Android with sync capabilities)
- Minimum 8GB RAM (16GB recommended for optimal performance)
- Color-calibrated monitor for accurate editing
File Format Compatibility:
- .XMP preset files (modern format)
- .LRTEMPLATE files (legacy format)
- .DNG preset files (mobile-compatible)
- RAW file support for maximum editing flexibility

Step-by-Step Guide: Installing and Organizing Presets
Method 1: Direct Import Through Lightroom
- Access the Presets Panel
- Navigate to the Develop Module
- Locate the Presets panel on the left sidebar
- Click the ‘+’ icon in the panel header
- Import Your Preset Files
- Select “Import Presets” from the dropdown menu
- Navigate to your downloaded preset files
- Select single or multiple preset files (.xmp or .lrtemplate)
- Click “Import” to add them to your library
- Verify Installation
- Presets appear in designated folders
- Test preview by hovering over preset names
- Check for any import errors or conflicts
Method 2: Manual Installation for Advanced Users
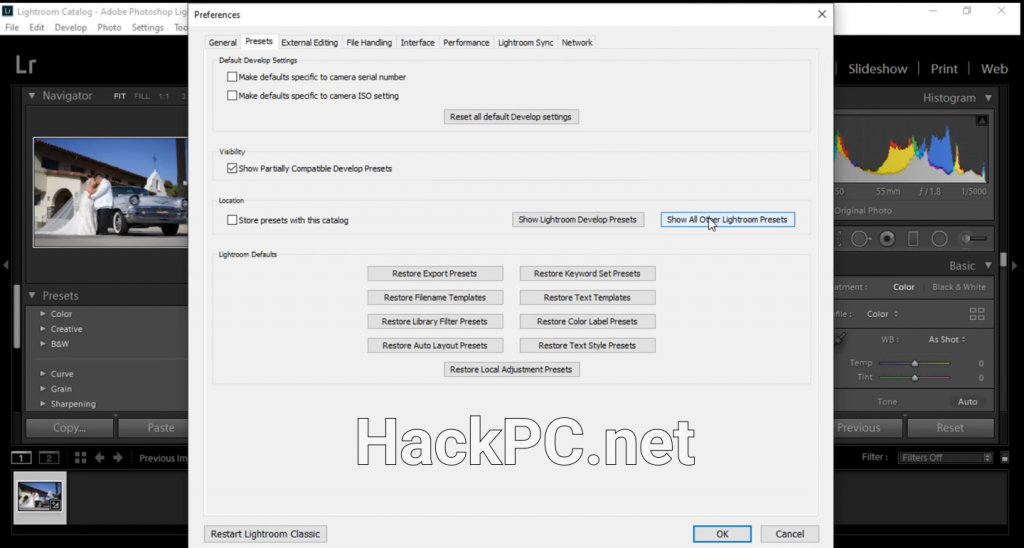
- Locate Lightroom Settings Folder
- Windows: C:\Users\[username]\AppData\Roaming\Adobe\Lightroom\Develop Presets
- Mac: ~/Library/Application Support/Adobe/Lightroom/Develop Presets
- Create Organized Folder Structure
- Create custom folders for preset categories
- Name folders descriptively (e.g., “Portrait_Warm_Tones”)
- Maintain logical hierarchy for easy navigation
- Copy Preset Files
- Drag preset files into appropriate folders
- Restart Lightroom to refresh preset library
- Verify folder structure in Develop Module
Applying Presets: Professional Techniques
Single Photo Application
- Select Your Target Image
- Enter Develop Module
- Choose photo from filmstrip
- Ensure proper exposure before preset application
- Preview and Apply
- Hover over preset names for live preview
- Click preset to apply adjustments
- Fine-tune with manual adjustments if needed
Batch Processing Multiple Photos
Quick Develop Method (Library Module):
- Select Multiple Images
- Use Ctrl/Cmd+Click for individual selection
- Use Shift+Click for consecutive selection
- Press Ctrl/Cmd+A to select all
- Apply Preset via Quick Develop
- Locate Quick Develop panel
- Choose preset from “Saved Preset” dropdown
- Preset applies to all selected images simultaneously
Sync Settings Method:
- Edit First Photo
- Apply preset to primary image
- Make additional manual adjustments
- Perfect the look for your needs
- Sync to Additional Photos
- Select edited photo first (most selected)
- Add additional photos to selection
- Click “Sync” or “Sync Settings”
- Choose which settings to synchronize
Import Presets Application
- Configure Import Dialog
- Open Import dialog (File > Import)
- Select photos for import
- Navigate to “Apply During Import” panel
- Select Develop Settings
- Choose preset from dropdown menu
- Preset applies to all imported photos
- Combine with metadata presets for efficiency
Creating Custom Presets: Your Signature Style
Developing Your Preset
- Perfect Your Edit
- Start with properly exposed RAW file
- Apply all desired adjustments
- Test on multiple photo types
- Save as New Preset
- Click ‘+’ in Presets panel
- Select “Create Preset”
- Name descriptively with version numbers
- Choose Settings to Include
- Select relevant adjustment categories
- Exclude image-specific corrections
- Consider partial presets for flexibility
Best Practices for Custom Preset Creation
- Avoid Absolute Values: Use relative adjustments when possible
- Test Across Various Lighting: Ensure versatility in different conditions
- Create Preset Variations: Develop strength levels (subtle, standard, intense)
- Document Your Presets: Maintain notes on intended use cases
- Version Control: Update presets with version numbers
Advanced Preset Management Strategies
Organizing Your Preset Library
- Create Logical Folder Structure
- By photography genre (Portrait, Landscape, Street)
- By color grade (Warm, Cool, Cinematic)
- By client or project
- By processing style (Film Emulation, Black & White)
- Implement Naming Conventions
- Use descriptive prefixes
- Include version numbers
- Add photographer initials for shared catalogs
- Indicate strength levels (Light, Medium, Heavy)
Keyword Integration with Presets
Combine preset application with strategic keyword tagging for maximum efficiency:
- Create Keyword Sets
- Associate keywords with preset styles
- Build genre-specific keyword groups
- Use hierarchical keyword structures
- Metadata Preset Combinations
- Link develop presets with metadata presets
- Apply copyright information simultaneously
- Add location data during import
Troubleshooting Common Preset Issues
Preset Not Showing Up
- Verify correct file format (.xmp or .lrtemplate)
- Check installation directory permissions
- Restart Lightroom after installation
- Update to latest Lightroom version
Inconsistent Results
- Ensure consistent starting point (exposure/white balance)
- Check process version compatibility
- Verify camera profile settings
- Consider creating adaptive presets
Performance Issues
- Optimize catalog size and preview settings
- Clear preview cache regularly
- Limit number of installed presets
- Use smart previews for faster processing
Mobile Preset Workflow
Syncing Desktop to Mobile
- Enable Creative Cloud Sync
- Sign in to Creative Cloud
- Enable preset syncing in preferences
- Wait for initial sync completion
- Mobile-Specific Considerations
- Convert to DNG format for compatibility
- Adjust for smaller screen preview
- Create mobile-optimized preset variations
Direct Mobile Installation
- Import DNG Preset Files
- Download preset DNG files to device
- Import into Lightroom Mobile
- Create preset from imported settings
- Share Across Devices
- Use Creative Cloud sync
- Export and share preset files
- Maintain consistency across platforms
Professional Tips for Preset Mastery
Efficiency Maximization
- Use Preset Stacking: Apply multiple presets sequentially for complex looks
- Create Adjustment Brush Presets: Save local adjustment settings
- Develop Import Presets: Streamline workflow from capture
- Utilize Virtual Copies: Test multiple presets non-destructively
Quality Control
- Monitor Calibration: Ensure accurate color representation
- Regular Preset Audits: Remove unused or outdated presets
- Backup Preset Library: Maintain copies of custom presets
- Document Workflows: Create preset application guides
Creative Considerations
- Understand Color Theory: Apply complementary color grades
- Study Film Emulation: Learn from analog photography
- Analyze Professional Work: Reverse-engineer editing styles
- Experiment Fearlessly: Push boundaries with preset combinations
Industry-Specific Preset Applications
Wedding Photography
- Consistent skin tone preservation
- Romantic color grading options
- Batch processing for large events
- Quick black and white conversions
Portrait Photography
- Skin smoothing presets
- Eye enhancement combinations
- Background separation techniques
- Color harmony adjustments
Landscape Photography
- Dynamic range optimization
- Color vibrancy enhancement
- Graduated filter presets
- Atmospheric perspective control
Commercial Photography
- Brand color consistency
- Product photography presets
- Lifestyle image processing
- Social media optimization
Preset Marketplace and Resources
Premium Preset Collections
- Research photographer-developed presets
- Evaluate before purchasing with samples
- Check compatibility with your Lightroom version
- Read user reviews and testimonials
Free Preset Resources
- Adobe’s built-in preset library
- Photography community shares
- Educational institution resources
- Trial versions from premium developers
Future-Proofing Your Preset Workflow
Emerging Technologies
- AI-powered adaptive presets
- Machine learning optimization
- Cloud-based preset libraries
- Cross-platform compatibility improvements
Staying Current
- Follow Adobe updates and features
- Participate in photography communities
- Attend workshops and webinars
- Experiment with new techniques regularly
Conclusion: Elevating Your Photography Through Presets
Mastering Lightroom presets transforms not just your editing efficiency but your entire photographic workflow. From initial import to final export, presets provide consistency, speed, and creative flexibility that elevate your work to professional standards. Whether you’re processing a single portrait or thousands of event photos, the strategic use of presets ensures your signature style shines through while maintaining the flexibility to adapt to each unique image.
Remember that presets are starting points, not final destinations. The true power lies in understanding how they work, customizing them to your vision, and building a library that reflects your unique artistic voice. As you continue developing your preset workflow, focus on creating systems that enhance rather than replace your creative decision-making process.
Start implementing these techniques today, and watch as your editing time decreases while your consistency and quality soar. The investment in mastering presets pays dividends in both time saved and creative possibilities unleashed.


Comments (0)