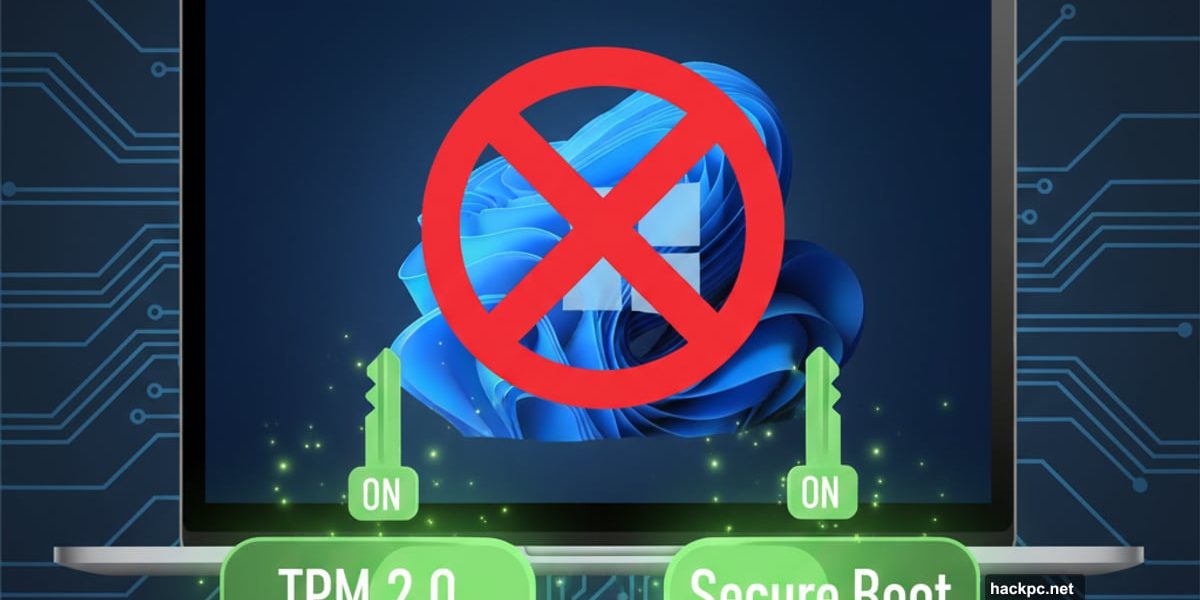
Microsoft says your PC won’t run Windows 11. But chances are, it actually can.
Windows 10 support ended in October. Millions rushed to upgrade. Then hit a wall. Windows Update claimed their computers weren’t compatible. But here’s the thing—most of those “incompatible” machines just need two simple settings changed.
I know because mine was one of them. Six-year-old desktop. Microsoft said no way. Five minutes in BIOS settings later? Fully compatible.
The Real Problem Isn’t Your Hardware
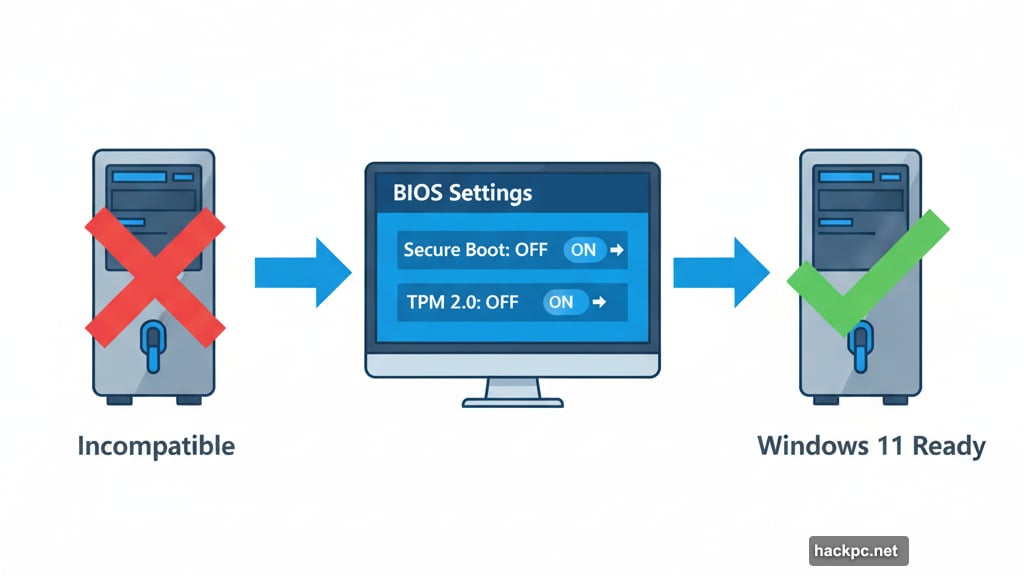
Windows 11 requires two security features: Secure Boot and TPM 2.0. Most computers from 2016 onward have the necessary hardware. But the features sit there disabled.
Why? Manufacturers often ship machines with these settings turned off. They work fine with Windows 10 that way. So nobody bothered enabling them.
Now Windows 11 demands they’re active. Your computer fails the compatibility check. Microsoft tells you to buy new hardware. But you don’t actually need to.
Check What’s Actually Missing
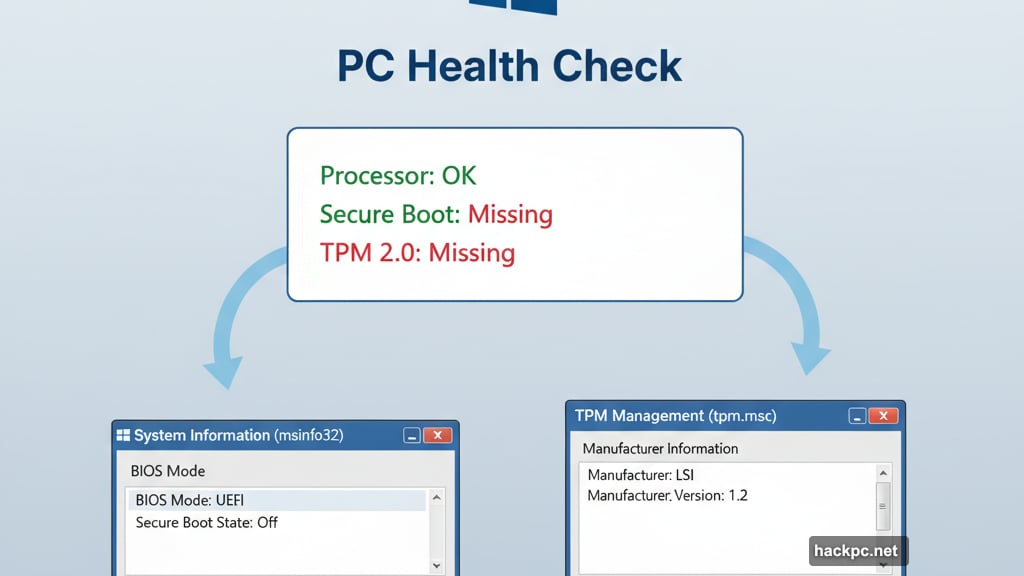
First, figure out why Windows blocked your upgrade. Download Microsoft’s PC Health Check app if you don’t have it. Press the Windows key. Type “Health Check.” Run it.
The app lists specific compatibility problems. Look for mentions of Secure Boot or TPM. Those are fixable. If it flags your processor as incompatible, that’s trickier. But still potentially solvable with a clean install.
Most people see Secure Boot and TPM issues. Those take minutes to resolve.
Find Your Current Settings
Press Windows plus R keys together. Type “msinfo32” without quotes. Hit enter.
Look for these lines:
- BIOS Mode should say “UEFI”
- Secure Boot State probably says “Off”
- System Type needs to show “x64-based”
Write down your Baseboard Manufacturer and Product. You’ll need those later to find BIOS instructions specific to your motherboard.
Next, press Windows plus R again. Type “tpm.msc” this time. If you see manufacturer information and version numbers, your TPM hardware exists. It just needs activation.
No information displayed? Don’t panic yet. The hardware might still be there, just completely disabled.
The BIOS Settings That Change Everything
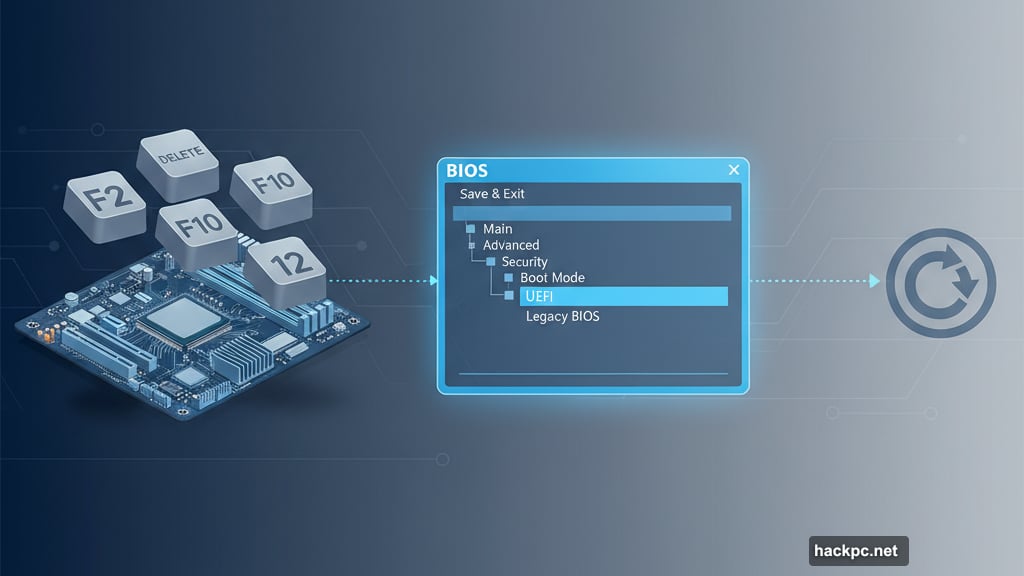
Here’s where it gets slightly technical. But only slightly. You need to access your computer’s BIOS—the basic system that runs before Windows loads.
Restart your computer. As it boots up, press Delete or F2 repeatedly. Most motherboards use one of those keys. Some use F10 or F12 instead.
Can’t get in? Google your motherboard model plus “access BIOS.” The manufacturer’s site will tell you exactly which key to press.
Enable UEFI Mode
Once inside BIOS, look for boot mode settings. You want UEFI enabled instead of Legacy BIOS mode. Most systems already use UEFI. If not, switch it and restart.
Can’t find UEFI option? Check under Advanced settings. Every manufacturer organizes menus differently. But UEFI mode is always there somewhere if your motherboard supports it.
No UEFI support at all? Your motherboard is too old. Windows 11 won’t work. Time to consider new hardware.
Turn On Secure Boot
Back in BIOS after enabling UEFI. Find Secure Boot settings. Toggle it on.
Technically, Windows 11 just needs Secure Boot available. But unless you plan to dual-boot Linux, turn it on. It blocks certain malware types. No reason to leave it disabled.
Activate TPM
Last step. Look for TPM, Platform Security, or Security Device settings. Different manufacturers use different names.
Enable TPM 2.0 if available. Some older systems only have TPM 1.2. That works too, though Microsoft officially requires 2.0.
On my MSI motherboard, TPM lived under Settings > Security > Trusted Computing. On ASUS boards, it’s typically under Advanced > PCH-FW Configuration. Your mileage varies.
Save changes. Restart your computer. Windows should boot normally.
Verify It Worked
Run PC Health Check again after restarting. If those BIOS changes worked, Windows 11 compatibility should now show green checkmarks.
Still blocked? Run msinfo32 and tpm.msc again. Verify Secure Boot shows “On” and TPM displays version information. If not, you missed a setting or your hardware genuinely lacks support.
The Registry Workaround Nobody Should Try
Some sites recommend Registry edits to bypass TPM requirements entirely. Microsoft even documented this method briefly before removing the page.
Don’t do it. Messing with Registry can brick your computer. Plus, you’re installing an OS without required security features. That defeats the whole point of upgrading.
If your hardware can’t enable TPM 2.0 properly, buy new hardware. Registry hacks aren’t worth the risk.
When Hardware Actually Is Too Old
Motherboards older than 2016 probably lack TPM 2.0 compatibility. No amount of BIOS tweaking fixes that.
One last hope exists. Some companies sell TPM modules—small cards that plug into specific motherboard headers. Search your motherboard model plus “TPM module compatibility.”
But honestly? If your computer is that old, buying a TPM module makes less sense than replacing the whole system. Modern budget laptops outperform decade-old desktops anyway.
Why This Matters Beyond Just Upgrading
Windows 10 loses security updates in October 2026. After that, vulnerabilities pile up fast. Hackers know millions of machines will stay on unsupported Windows 10. Easy targets.
Sure, you could keep using Windows 10 offline forever. Never connect to internet. Never download anything. But that’s not realistic for most people.
Spend five minutes tweaking BIOS now. Or spend hundreds on new hardware later. Your choice.
About 40 Percent Still Haven’t Upgraded
As of September, 40% of Windows users ran Windows 10. That’s millions of computers. Most probably just need these simple fixes.
Microsoft wants to sell new Windows 11 licenses and hardware. So their messaging around compatibility leans aggressive. But the reality is less dire.
Check your BIOS settings first. You might already have everything Windows 11 needs. Just sitting there disabled for no good reason.


Comments (0)