Your Gmail inbox hit its limit again. The dreaded “storage full” message appeared. Now you can’t send or receive emails until you fix it.
Most people face two bad options: Pay Google $20 yearly for more space, or spend hours deleting old messages one by one. But there’s a third way that costs nothing and takes minutes instead of days.
I discovered this after my own decade-old Gmail account filled up. I wasn’t about to sort through 75,000 emails manually. So I found a workaround that freed up 12GB in about 48 hours without losing a single message.
The 15GB Limit Sneaks Up Fast
Gmail promises 15GB of free storage when you sign up. Sounds generous. But that space disappears faster than you’d think.
Here’s the catch. Those 15 gigabytes aren’t just for email. They also cover every file in Google Drive and every photo in Google Photos. Send one video attachment and you’ve burned through hundreds of megabytes in seconds.
Plus, email file sizes keep growing. A decade ago, most messages were plain text. Now they’re packed with images, PDFs, and video clips. Meanwhile, promotional emails arrive daily with massive graphics you never asked for.
Before you know it, Gmail locks you out. You can’t send messages. Worse, incoming emails bounce back to senders. That’s how I realized my account was toast.
The Transfer Trick Nobody Talks About
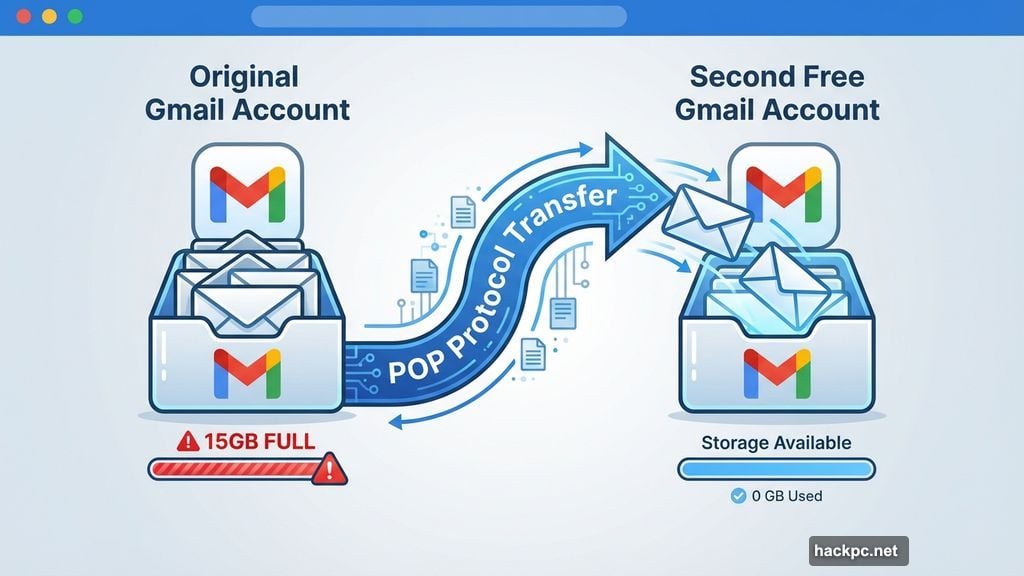
Google lets you create unlimited free accounts. So instead of deleting old emails or paying for storage, you can move everything to a second account.
Think of it as creating your own personal email archive. Your original inbox stays active for new messages. Your second account stores all the old ones. Both accounts remain free.
This approach beats the alternatives hands down. Deleting emails means losing memories and important records forever. Downloading everything to your computer just moves the storage problem somewhere else. Paying Google works but costs money every year.
The transfer process uses Gmail’s built-in POP protocol. POP stands for Post Office Protocol. It’s designed to sync messages between accounts automatically.
Here’s what makes this method brilliant: Gmail does all the heavy lifting. You set it up once, then walk away. The transfer happens in the background while you do other things.
Backup First, Transfer Second
Before moving any emails, save a complete backup. This gives you insurance if something goes wrong during the transfer.
Google Takeout handles backups automatically. Visit the Takeout page while logged into your Gmail account. Select the data you want to download. Google packages everything into a zip file you can save anywhere.
My test account held about 75,000 messages. Google Takeout delivered the complete backup in roughly 2 hours. Your timing will vary based on inbox size.
Store this backup on an external hard drive or cloud service outside Google. That way you’ve got a copy even if both Gmail accounts somehow fail.
Setting Up Your Original Account
Now you’re ready to start the actual transfer. First, you need to enable POP on your current Gmail account.
Log into your original Gmail. Click the gear icon in the top right corner. Select “See all settings” from the dropdown menu.
Navigate to the “Forwarding and POP/IMAP” tab at the top. Look for the section labeled “POP Download.” Click the radio button next to “Enable POP for all mail.”
This part matters: Choose what happens after messages transfer. Gmail offers several options under “When messages are accessed with POP.” Select “delete Gmail’s copy” if you want messages automatically removed from your original account after they move.
Hit “Save Changes” at the bottom. Your original account is now ready to send emails to your new archive.

Creating Your Archive Account
Open a new browser window or use incognito mode. Create a brand new Gmail account. This becomes your permanent archive for old messages.
Choose a username you’ll remember. Something like “yourname.archive” works well. You’ll need to access this account at least once every two years to keep it active.
Once you’ve created the archive account, log in and click that gear icon again. Go to “See all settings” just like before.
This time, select the “Accounts and Import” tab. Find the section called “Check mail from other accounts.” Click “Add a mail account.”
A pop-up window appears. Enter your original Gmail address. Click “Next.”
Syncing the Two Accounts
Select “Import emails from my other account (POP3)” on the next screen. Click “Next” again.
Now comes the tricky part. Enter your original account’s password. Here’s where many people hit a wall: Google might reject your regular password for security reasons.
If your normal password doesn’t work, you’ll need to create an app password instead. App passwords are temporary 16-digit codes Google generates for less secure connections.
Visit myaccount.google.com/apppasswords while logged into your original account. Create a name for the password like “Email Transfer.” Click “Create.”
Google displays your new 16-digit code once. Write it down immediately. You won’t see it again.
Return to your archive account setup. Use this app password instead of your regular one.
Finishing the Transfer Setup
Back in the account setup screen, change the Port number to 995. This ensures a secure connection between accounts.
Check three critical boxes:
- Always use a secure connection (SSL) when retrieving mail
- Label incoming messages
- Archive incoming messages (Skip the Inbox)
That last checkbox is crucial. It tells Gmail to file transferred messages directly into your archive rather than cluttering your new inbox.
Click “Add Account” to finalize everything.
The Waiting Game
Gmail starts transferring messages immediately. But the process takes time. A lot of time.
My 75,000 message test account took two full days to complete the transfer. Smaller inboxes finish faster. Larger ones might take even longer.
You can use both accounts normally during this period. Send and receive new emails as usual. The transfer happens quietly in the background.
Check your archive account periodically. You’ll see the message count climbing as emails arrive from your original inbox.
Cleaning Up the Mess
Once the transfer completes, your original account moves all those messages to the Trash folder. Gmail doesn’t automatically empty Trash, so you’ll need to do it manually.
Select the Trash folder in your original account. Click “Empty Trash now” at the top. This step took about an hour for my 75,000 messages.
After emptying Trash, check your storage usage. My test account dropped from 12GB to just 0.66GB. That’s 11.34GB freed up without deleting a single important email.
What Doesn’t Transfer
Gmail moves almost everything between accounts. But two categories stay behind: Drafts and Spam.
You’ll need to handle Drafts manually. Open each one, save any important content, then delete them. Or forward the Drafts to your archive account before starting the transfer.
Spam messages auto-delete every 30 days anyway. So you can either ignore them or manually forward anything important before the transfer.
Stopping the Sync
After your emails finish transferring, disconnect the two accounts. Otherwise, Gmail continues syncing new messages to your archive forever.
Log into your archive account. Go to Settings, then “Accounts and Import.” Find your original account under “Check mail from other accounts.” Click “delete” next to it.
Confirm the deletion when prompted. Your accounts are now separate again.
If you created an app password earlier, delete it now. Visit myaccount.google.com/apppasswords and click the trash icon next to your transfer password.
Keep Your Archive Alive
Google deletes inactive accounts after two years. So don’t completely forget about your archive.
Log in at least once every 24 months. Send yourself a test email if you want to be extra safe. That resets the inactivity timer.
You could also set a calendar reminder for 18 months from now. That gives you a comfortable buffer before the two-year deadline.
The Real Storage Hog
Here’s something Google won’t tell you: Email isn’t usually the biggest storage problem. Photos and videos eat up way more space.
Check your Google Photos storage. Many people have years of high-resolution images they never look at. Those files can consume 10GB or more.
Same with Google Drive. That presentation from 2015? The spreadsheet you haven’t opened in three years? They’re all counting against your 15GB limit.
So after clearing your Gmail, audit Photos and Drive too. You might find gigabytes of files you don’t actually need.
This free account approach saved me from paying Google indefinitely. It took two days of waiting but zero actual effort. Plus, I kept every email just in case I need them someday.
The alternative was spending hours sorting messages or shelling out $20 annually forever. Neither option made sense when a free second account solved everything.


Comments (0)