FL Studio has launched countless music careers from bedroom studios around the world. Whether you’re dreaming of producing the next viral hit or simply want to express your creativity through music, this powerful DAW (Digital Audio Workstation) makes professional production accessible to everyone. Let’s explore how to harness FL Studio’s capabilities, with insider tips that’ll accelerate your learning curve.
Getting Started: Your First Steps in FL Studio
Think of FL Studio as your digital music studio where every instrument, effect, and mixing tool lives on your computer screen. Unlike traditional recording studios that require rooms full of expensive equipment, FL Studio puts everything you need at your fingertips.
Essential Components You’ll Use Every Day:
- Channel Rack: Your instrument organizer (like a band lineup)
- Piano Roll: Where you write melodies (think digital sheet music)
- Playlist: Your song arranger (like a timeline for your track)
- Mixer: Your sound control center (adjusts volumes and effects)
- Browser: Your sample and preset library (your sonic toolbox)
Beginner’s Golden Rule: Don’t feel overwhelmed by all the buttons and knobs. Even professionals like Martin Garrix started by learning just one feature at a time.
Setting Up FL Studio Like a Pro (Even If You’re Not One Yet)
Step 1: Configure Your Audio Settings
Navigate to Options > Audio Settings and follow these beginner-friendly steps:
- Select your audio device (usually your computer’s sound card to start)
- If you experience crackling sounds, increase the buffer length slider
- For recording without delay, download and install ASIO4ALL
- Set buffer to 512 samples – this balances performance and quality
Quick Tip: Can’t hear anything? Check that your master volume (top toolbar) isn’t muted – it happens to everyone!
Step 2: Customize Your Workspace
FL Studio lets you arrange windows however you like:
- Drag window edges to resize
- Click the dropdown arrow on any window to detach it
- Press Tab to hide/show all windows quickly
- Save your layout via View > Layouts > Save
Beginner’s Hack: Start with the default layout until you understand what each window does, then customize based on your workflow preferences.
Creating Your First Beat: A Step-by-Step Journey
Understanding Patterns and the Step Sequencer
Patterns are like musical building blocks – create different patterns for verses, choruses, and bridges, then arrange them to build your complete song.
Step-by-Step Beat Creation:
- Open the Channel Rack (F6)
- Click the dots to create a basic kick pattern on steps 1, 5, 9, and 13
- Add hi-hats on every step for energy
- Right-click dots to delete mistakes
- Hold Alt while clicking to preview sounds
Pro Insight for Beginners: Producer Murda Beatz suggests starting every track with drums – they’re the foundation that keeps listeners moving.
Your First Melody Using the Piano Roll
The piano roll might look intimidating, but it’s actually incredibly intuitive once you understand the basics:
- Right-click any channel in the Channel Rack
- Select Piano roll
- Left-click to place notes
- Hold and drag notes to move them
- Drag note edges to make them longer or shorter
- Hold Ctrl+L to hear your melody loop
Helpful Shortcuts:
- Alt+L: Creates a legato (smooth connection between notes)
- Ctrl+Up/Down arrows: Move notes by octaves
- Shift+Click: Select multiple notes
- Alt+R: Randomize velocity for human feel
Beginner’s Breakthrough: Can’t come up with melodies? Use the stamp tool (Shift+P) to try pre-made chord progressions and scales!
Sound Selection and Basic Sound Design
Finding and Using Sounds
FL Studio comes packed with thousands of quality sounds. Here’s how to navigate them effectively:
The Browser Navigation Guide:
- Packs folder: Complete drum kits and instrument sets
- Samples folder: Individual sounds and loops
- Presets folder: Ready-to-use instrument sounds
- Plugin presets: Professional starting points for synthesizers
Time-Saving Tip: Type in the search box to instantly find sounds. Looking for a snare? Just type “snare” and all options appear!
Making Any Sound Your Own
Even preset sounds can become unique with simple tweaks:
- Add any sound to the Channel Rack
- Click the channel to open its settings
- Adjust these beginner-friendly knobs:
- Volume knob: Overall loudness
- Pan knob: Left/right position
- Pitch knob: Higher or lower tone
Creative Hack: Right-click the pitch knob and select “Type in value” – try +7 or -7 semitones for instant harmonic variations!
Building Complete Songs: From Loop to Full Track
The Playlist: Your Song’s Timeline
Think of the Playlist as a canvas where you paint with patterns and audio clips:
Basic Arrangement Workflow:
- Press F5 to open the Playlist
- Paint your patterns using the brush tool (B)
- Create variations by cloning patterns (Shift+Ctrl+C)
- Color-code sections (right-click > color)
- Red for drums
- Blue for bass
- Green for melodies
- Yellow for vocals
Structure Template for Beginners:
- Intro: 8 bars
- Verse: 16 bars
- Chorus: 8 bars
- Verse: 16 bars
- Chorus: 8 bars
- Outro: 8 bars
Industry Secret: Producer Nick Mira suggests keeping your first songs under 3 minutes – it’s easier to maintain quality and listener attention!
Mixing Your Track: Making Everything Sound Good Together
Understanding the Mixer
The mixer is where your sounds become a cohesive song. Each channel needs its own space in the mix, like giving each person in a conversation room to speak.
Simple Mixing Steps for Beginners:
- Route channels to the mixer:
- Select a channel in the Channel Rack
- Press Ctrl+L
- Choose an empty mixer track
- Basic EQ adjustments (Every track needs this!):
- Add Fruity Parametric EQ 2 to a mixer slot
- Cut low frequencies on everything except bass and kicks
- Boost slightly around 5-10kHz for brightness
- Add space with reverb:
- Insert Fruity Reverb 2 on a send channel
- Route other channels to this send
- Adjust the send amount for each instrument
Volume Balancing Trick: Start with all faders at -6dB, then bring up the most important element (usually vocals or lead melody) first, building everything else around it.
Compression Made Simple
Compression makes quiet parts louder and loud parts quieter, creating consistent, professional sound:
Beginner’s Compression Settings:
- Ratio: 3:1 (gentle compression)
- Threshold: Adjust until you see 3-5dB of gain reduction
- Attack: 10ms for drums, 30ms for vocals
- Release: Match to your song’s tempo
Visual Learning Tip: Watch the compression meter – if it’s constantly maxed out, you’re overdoing it!
Essential FL Studio Features You’ll Love
Automation: Bringing Your Music to Life
Automation creates movement and emotion in your tracks:
Quick Automation Tutorial:
- Right-click any knob or fader
- Select “Create automation clip”
- Draw curves in the Playlist
- Right-click points to change curve types
Popular Automation Ideas:
- Gradually increase reverb during transitions
- Automate volume for smooth fade-ins/outs
- Filter sweeps for build-ups
- Pan automation for moving sounds
Time-Saving Features Most Beginners Miss
Quick Quantize (Alt+Q): Fixes timing issues instantly – use this when your recordings feel “off beat”
Ghost Notes: In the Piano Roll, see other instruments as transparent guides – perfect for writing harmonies!
Snap Settings: Right-click the snap button to change grid size – use “none” for humanized feel, “1/4 beat” for precise timing
Clone Channels (Alt+C): Duplicate any sound with all its settings – great for layering!
Smart Disable (Alt+D): Temporarily turn off heavy plugins to reduce CPU usage while working
Recording Vocals and Instruments
Setting Up for Recording
Recording in FL Studio is straightforward once you know the basics:
Pre-Recording Checklist:
- Connect your microphone or instrument
- Select the correct input in mixer channel properties
- Enable “Record arm” on the mixer track
- Press R to enable recording mode
- Choose “Audio, into the playlist”
Microphone Placement Tip: Keep your mic 6-8 inches from your mouth with a pop filter between. No pop filter? A clean sock over a coat hanger works!
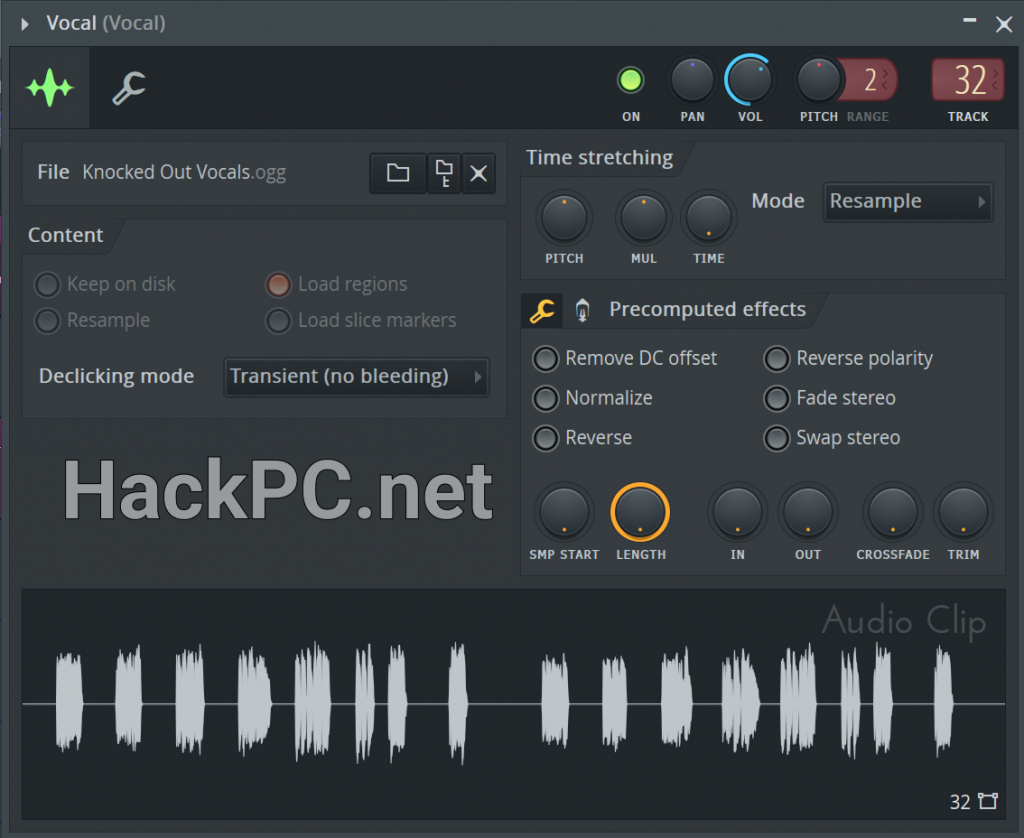
Using Edison for Perfect Takes
Edison is FL Studio’s secret weapon for recording:
Edison Recording Workflow:
- Add Edison to your vocal mixer track
- Click the record button in Edison
- Press play and perform
- Edit out mistakes directly in Edison
- Drag the cleaned audio back to the Playlist
Noise Removal Magic: Record 3 seconds of silence before performing, then use Edison’s noise removal tool to clean up background hiss!
Mastering: The Final Polish
Making Your Track Loud and Clear
Mastering makes your song sound professional on all speakers:
Beginner’s Mastering Chain:
- EQ: Gentle adjustments only
- Slight boost at 10kHz for “air”
- Small cut around 300Hz to reduce muddiness
- Compression: Use Fruity Multiband Compressor
- Load the “Mastering 2.4:1” preset as a starting point
- Adjust input gain until you see gentle movement
- Limiting: Fruity Limiter on the master channel
- Increase gain until the song feels loud
- Watch for the red “clipping” indicator – back off if it lights up!
Loudness Target: Aim for -14 LUFS for Spotify – use Wave Candy’s dB meter to check!
Troubleshooting Common Beginner Issues
“Why doesn’t my track sound professional?”
Common fixes:
- Too many sounds competing for the same frequency
- Not enough contrast between sections
- Missing reference tracks (always compare to songs you love!)
- Forgetting to high-pass filter non-bass elements
“FL Studio keeps crashing!”
Solutions:
- Increase buffer size in audio settings
- Freeze CPU-heavy tracks (Tools > Macros > Freeze)
- Disable plugins you’re not actively using
- Save different versions frequently (Ctrl+Shift+S)
“My recordings sound delayed”
Quick fix: Enable “Auto PDC” (Plugin Delay Compensation) in the mixer menu – this syncs everything perfectly!
Growing Your Skills
Daily Practice Routine for Rapid Improvement
15-Minute Daily Challenges:
- Monday: Recreate a drum pattern from your favorite song
- Tuesday: Design one new sound from scratch
- Wednesday: Practice piano roll shortcuts
- Thursday: Mix a previous project better
- Friday: Learn one new plugin feature
Learning Resources and Community
Join the FL Studio journey with millions of producers worldwide:
- Watch one YouTube tutorial daily
- Share works-in-progress for feedback
- Download free project files to study professional techniques
- Challenge yourself with remake contests
Remember: Every professional producer was once exactly where you are now. The difference? They kept creating, kept learning, and never stopped experimenting.
Your Next Steps
You now have the foundation to create professional music in FL Studio. Start with simple 8-bar loops, gradually building to complete songs. Remember that making music is like learning an instrument – daily practice yields exponential results.
The beauty of FL Studio lies in its flexibility. There’s no “wrong” way to create – whether you’re crafting trap beats like Metro Boomin, electronic symphonies like Deadmau5, or something entirely unique, these tools adapt to your vision.
Final Encouragement: Your first 100 songs might not be perfect, but song 101 could change everything. Open FL Studio right now, apply one technique from this guide, and start your journey. The music world is waiting for your unique voice!
Conclusion: Your FL Studio Production Journey
What You’ve Learned: The Complete Toolkit
Through this guide, you’ve discovered that FL Studio isn’t just software – it’s a complete music production ecosystem that grows with your skills. You now understand the core workflow: creating patterns in the Channel Rack, crafting melodies in the Piano Roll, arranging songs in the Playlist, and polishing everything in the Mixer. These four pillars form the foundation of every professional track created in FL Studio.
The technical knowledge you’ve gained – from setting proper buffer sizes and understanding automation clips to applying compression and EQ – represents months of traditional learning compressed into practical, actionable steps. More importantly, you’ve learned that professional production isn’t about expensive gear or secret techniques, but about understanding fundamental principles and applying them creatively.
Your Personalized Action Plan
Week 1-2: Foundation Building Start by mastering the basics we’ve covered. Create one simple 8-bar loop daily using only stock sounds. Focus on getting comfortable with the interface, practicing the keyboard shortcuts, and understanding signal flow from Channel Rack to Mixer. Don’t aim for perfection – aim for completion.
Week 3-4: Skill Expansion Begin incorporating automation, try recording audio with Edison, and experiment with different effects. Challenge yourself to recreate elements from songs you admire. This reverse-engineering process teaches you how professional tracks are constructed while building your technical vocabulary.
Month 2: Project Development Commit to finishing one complete song from intro to outro. Apply the arrangement structure template provided, use the mixing techniques you’ve learned, and push through the challenging middle phase where tracks often get abandoned. Remember: done is better than perfect, and finished tracks teach lessons that loops never will.
Month 3 and Beyond: Finding Your Voice With solid fundamentals established, begin developing your signature sound. Experiment with genre fusion, create custom effect chains in Patcher, and build your personal sample library. Share your work for feedback, collaborate with other producers, and most importantly, trust your creative instincts.
Overcoming the Learning Curve
Every FL Studio user faces similar challenges: the initial overwhelm of options, the frustration when mixes don’t sound professional, and the creative blocks that seem insurmountable. Remember that these struggles are part of the journey, not obstacles to it. When you hit these walls, return to this guide’s troubleshooting section, simplify your approach, and focus on one element at a time.
The professionals mentioned throughout this article – from Martin Garrix to Metro Boomin – all started with the same blank FL Studio project you’re facing. They succeeded not through innate talent alone, but through persistent experimentation, continuous learning, and the courage to share imperfect work that gradually improved.
The Power of Community and Continuous Learning
Your FL Studio journey doesn’t happen in isolation. The global community of FL Studio producers represents one of the most supportive and innovative groups in music production. Engage with online forums, participate in remix contests, and don’t hesitate to ask questions. Every advanced user was once a beginner who asked for help.
Keep this guide bookmarked as your reference manual, but also recognize that FL Studio evolves constantly. New updates bring new features, and the music industry’s sonic trends shift regularly. Stay curious, keep experimenting, and remember that every session in FL Studio – whether productive or frustrating – adds to your skill set.
Your Musical Future Starts Now
The comprehensive knowledge in this guide eliminates the excuse of not knowing where to start. You have step-by-step instructions for every essential process, solutions to common problems, and professional insights that typically take years to accumulate. The only remaining variable is your commitment to practicing and creating.
Open FL Studio right now – not tomorrow, not after watching more tutorials, but immediately. Load a drum loop, add a bassline, experiment with a melody. Apply just one technique from this guide, save your project, and congratulate yourself on taking the first step. Tomorrow, open that project and add something new. Within weeks, you’ll be amazed at your progress.
Remember: every chart-topping producer, every innovative sound designer, and every bedroom producer who made it big started exactly where you are now. The difference between dreaming about making music and actually producing it is simply opening FL Studio and beginning. Your unique musical perspective combined with these professional techniques can create something the world has never heard.
The tools are ready. The knowledge is yours. The only question remaining is: what will you create first?


Comments (0)