Want to turn ordinary headshots into eye-catching winter portraits? This detailed Photoshop tutorial walks through professional retouching techniques that work.
Many photographers struggle with seasonal photo manipulation. Plus, creating artistic portraits requires specific techniques most tutorials skip over. Let’s break down exactly how to achieve magazine-quality winter effects.
Skin Retouching Without Looking Fake
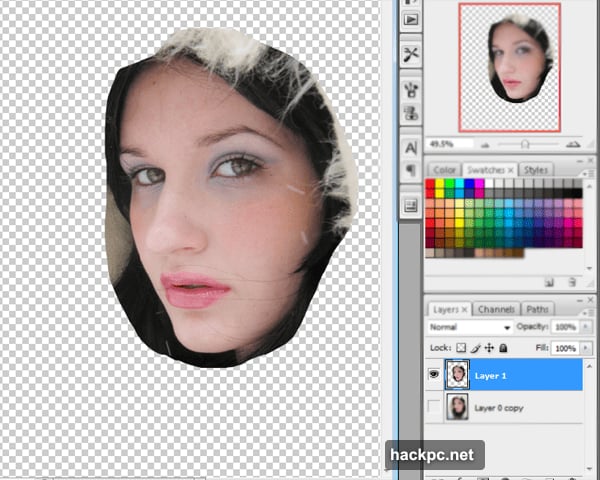
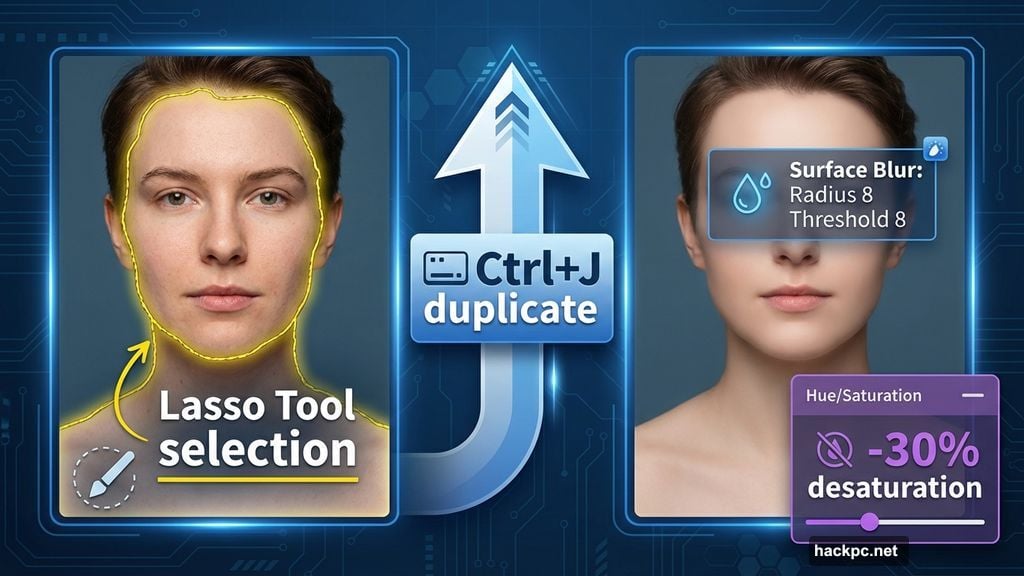
Start by isolating the skin using the Lasso Tool. Don’t stress about perfect selections. You’ll clean up edges later with the Eraser Tool.
Press Ctrl+J to duplicate your skin selection onto a new layer. This non-destructive workflow protects your original image.
Next, apply Surface Blur (Filter > Blur > Surface Blur). Set Radius to 8 and Threshold to 8. This smooths skin texture while preserving important details like pores and natural texture.
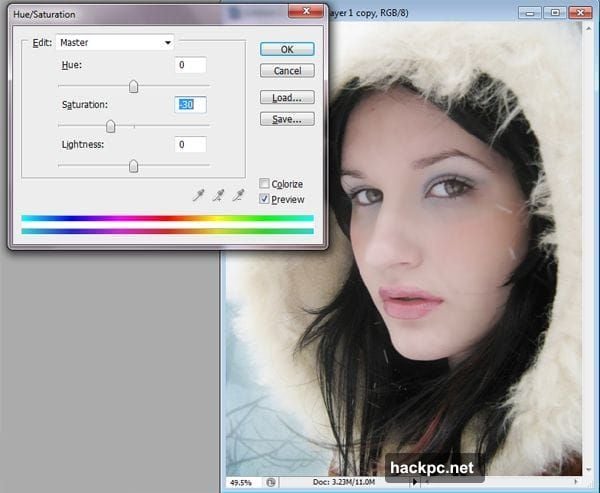
Now desaturate the skin layer by -30%. Press Ctrl+U to open Hue/Saturation controls. This subtle shift creates that cool winter skin tone.
For blemishes or stray hairs, grab the Patch Tool. It samples surrounding texture and blends seamlessly. Works better than Clone Stamp for organic elements like skin and hair.
Creating Bold Winter Lips
Select the lips with the Lasso Tool and duplicate (Ctrl+J). Remember, rough selections work fine since you’ll refine edges manually.
Change this lip layer to Multiply blend mode. Set Opacity to 50% and Fill to 80%. This darkens lips naturally without looking painted on.
Duplicate the lip layer again (Ctrl+J). Switch this copy to Soft Light at 60% opacity. Suddenly your lips have dimensional shine that photographs beautifully.
Transforming Eye Color Dramatically
Return to your skin layer and select the eyes with Lasso Tool. Duplicate with Ctrl+J.
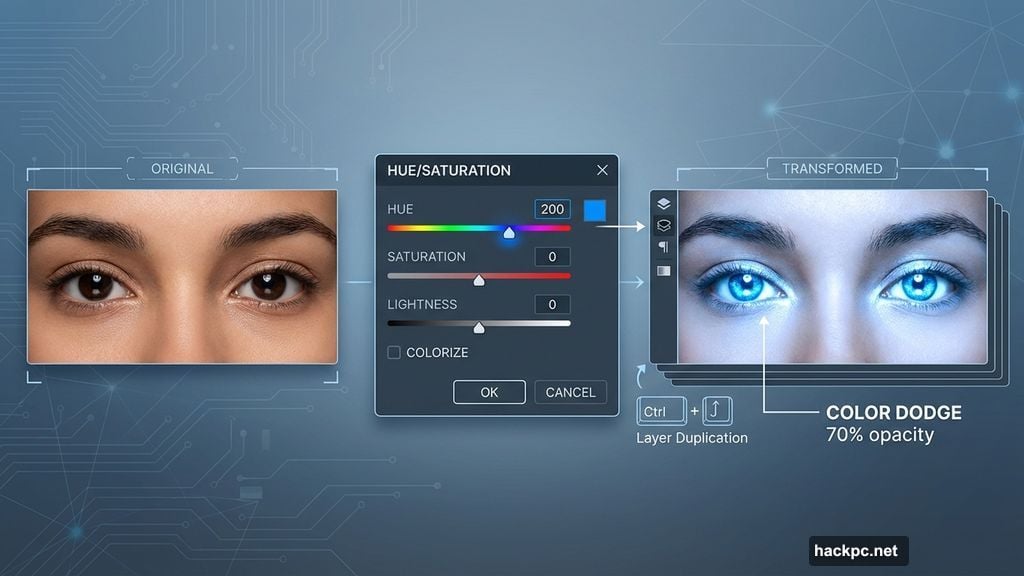
Press Ctrl+U for Hue/Saturation. Move the Hue slider to 200 for striking blue eyes. Adjust Saturation if needed for intensity.
Duplicate this eye layer once more. Set blend mode to Color Dodge at 70% opacity. This adds luminous highlights that make eyes pop.
Natural-Looking Blush Application
Create a new layer (Shift+Ctrl+N). Choose a soft pink from your color palette.

Use a large, soft brush with low hardness to paint rosy cheeks. Keep the application light and buildable.
Apply Gaussian Blur at 60 pixels (Filter > Blur > Gaussian Blur). This diffuses the color naturally into the skin.
Set layer to Multiply blend mode. Adjust Opacity to 50% and Fill to 80%. Now the blush looks like natural color, not face paint.
Winter Eye Makeup Technique
Create another new layer for eyeshadow. Select a deep blue-violet shade that complements winter themes.
Paint across the eyelid area with a soft brush. Build color gradually rather than applying heavily at once.
Apply Gaussian Blur around 40-50 pixels. This mimics how makeup naturally blends on skin.
Set the layer to Multiply or Soft Light depending on intensity desired. Adjust opacity until it looks professionally applied.
Adding Frozen Elements
This tutorial uses snow brushes and hair overlays to complete the winter effect. Import your downloaded snow brush set into Photoshop.
Create a new layer above all others. Select white as your foreground color. Apply snow brushes strategically around the portrait edges and hair.
For hair additions, paste hair stock images and use layer masks to blend naturally. Set blend mode to Screen or Lighten to integrate with existing hair.
Position glitter elements near the eyes or cheeks. Use Outer Glow layer styles to make glitter catch light realistically.
Color Grading for Winter Atmosphere
Add a Curves adjustment layer above all layers. Pull the blue channel up slightly in shadows for that cold winter cast.
Create a Color Balance adjustment layer. Push shadows toward blue and cyan. Move highlights slightly toward blue as well.
Add a subtle vignette using Levels. Darken the outer edges to draw focus to the subject’s face.
Fine-Tuning the Final Image
Zoom to 100% and check all edge work. Use a small, soft eraser to clean up any selection imperfections.
Adjust individual layer opacities if any effect looks too strong. Subtlety separates amateur work from professional results.
Flatten your image only after saving a layered master file. Always keep that original with layers intact for future edits.
Why This Approach Works Better
Most retouching tutorials skip the fundamentals of blend modes and layer opacity. But those controls make the difference between flat effects and dimensional portraits.
Using multiple layers for each feature gives precise control. You can adjust lips without affecting eyes, or tweak blush without changing skin tone.
The Surface Blur technique smooths skin while preserving critical texture. That’s why professional retouchers prefer it over simple Gaussian Blur.
Moreover, duplicating layers and varying blend modes creates depth. Real faces have multiple levels of color and light. Mimicking that complexity makes portraits look natural despite dramatic effects.
This workflow adapts to any portrait style. Swap winter elements for autumn leaves, spring flowers, or summer sunshine. The core techniques remain the same.
Practice these methods on multiple portraits. You’ll develop intuition for which blend modes and opacity levels work for different face shapes and lighting conditions.
The beauty of layer-based editing means mistakes never destroy your original. Experiment freely. That’s how you discover unique stylistic approaches that become your signature look.


Comments (0)