For about six years I finished everything inside Ableton. Mixed in it, mastered in it, exported from it. The workflow was efficient — one application, no file transfers, done. Then a mastering engineer friend listened to a few of my releases and asked me a question that I’ve thought about ever since: “Are you actually hearing what’s going out?” The answer, it turned out, was no. Not entirely. The problem wasn’t Ableton. It’s a capable DAW and plenty of professional work gets finished in it. The problem was that I was mastering inside the same environment where I’d mixed, with the same monitoring chain, the same visual reference, the same psychological attachment to decisions I’d already made. I was too close to it. And when I finally opened a finished WAV in a dedicated audio editor for the first time, I heard three things I hadn’t noticed: a low-frequency buildup in one track that EQ in the mix had partially but not fully addressed, an inconsistent loudness level between two tracks on the same EP, and a high- frequency edge on the lead synth that I’d convinced myself was “presence” but was actually closer to harsh. That was the beginning of a shift I haven’t reversed.
The Case for a Dedicated Audio Editor at the End of the Chain
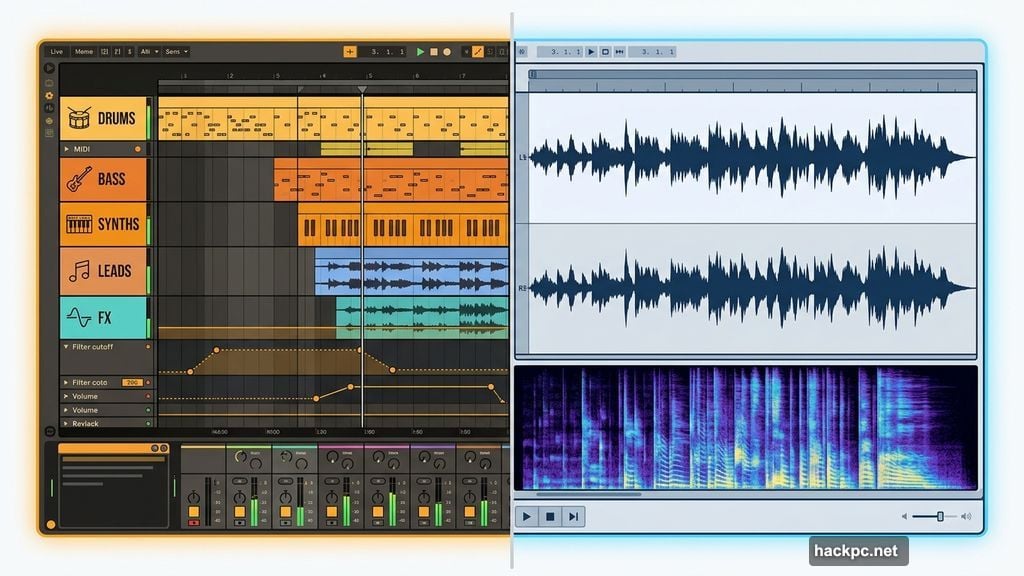
A DAW is designed for assembling and processing multiple tracks simultaneously. A dedicated audio editor is designed for examining and finalizing a single file with precision. These are different jobs, and the tools optimized for each reflect that difference.
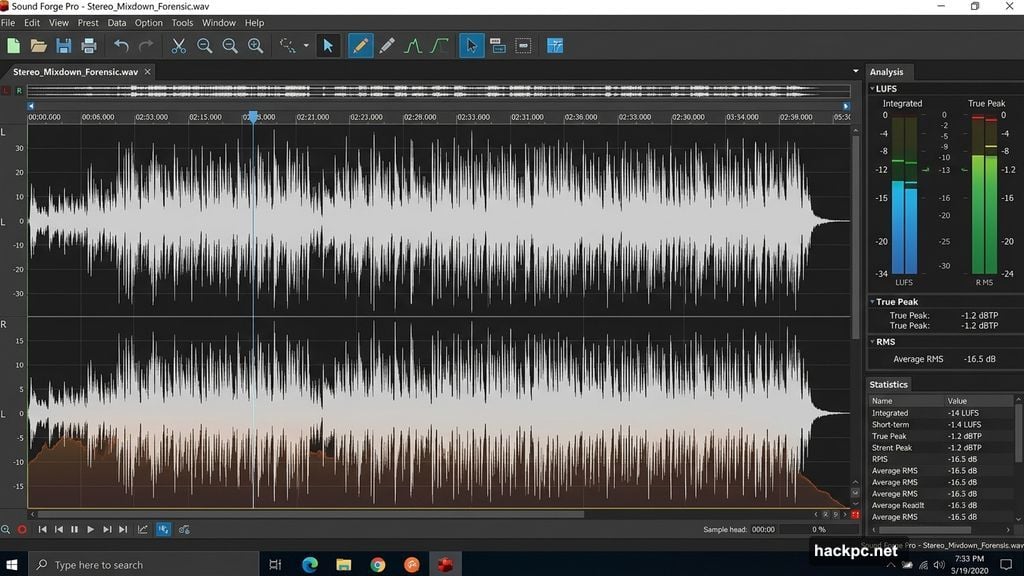
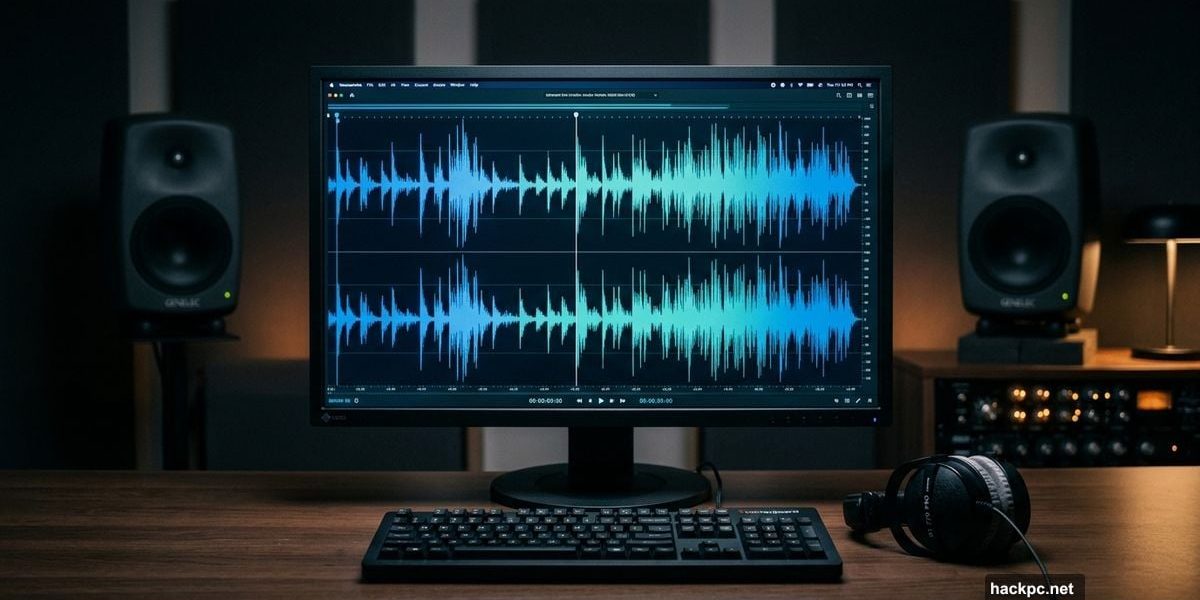
When I bring a stereo mixdown into an audio editor, I’m not mixing anymore. I’m inspecting. I want precise waveform visibility at the sample level, I want loudness measurement that gives me integrated LUFS without having to play back a 6-minute track in real time, I want spectral tools that show me frequency content cleanly. A DAW can do some of this, but it’s not what it was built for and the interface reflects that — the workflow is oriented toward arrangement and automation, not forensic examination of a finished file. The tool I settled on is Sound Forge Pro. It’s a Windows-only destructive audio editor that’s been in professional use since the early Sony era and is now maintained by Boris FX. What it offers for mastering finalization specifically: a real Statistics process that returns integrated LUFS, true peak, RMS, and loudness range from a full-file scan in seconds rather than real- time playback; a normalize workflow that handles Peak, RMS, and LUFS normalization through the same dialog with Scan Levels for non-destructive previewing; and a waveform editing environment that stays out of the way and lets you see what you’re actually working with. The Statistics process alone changed how I work. I run it on every file before I touch anything, then again after each processing step, then once more before export. A 5-minute track scans in under 10 seconds. I know exactly where I am at every stage, not approximately.
The Loudness Problem Nobody Talks About Enough
Most producers I know target loudness by ear and by watching a LUFS meter during playback. This works — it’s the standard approach. But it has a flaw: integrated LUFS requires a full playback of the file to measure accurately, which means every time you make an adjustment and want to verify the result, you play the whole file again. For a 4-minute song that’s manageable. For an album that needs consistent loudness across 10 tracks, it starts consuming time in ways that add up. And for podcast producers or voice-over editors delivering files under tight spec requirements — -24 LUFS ATSC, -23 LUFS EBU, or a custom streaming target — the back-and-forth gets tedious. Sound Forge Pro’s approach to this is more efficient. The Statistics process scans the file non-destructively and returns the full loudness picture in seconds. When you need to normalize to a proper loudness target, the workflow is: scan with Statistics, calculate the gain difference between current LUFS and target LUFS, apply that gain via Process → Volume, scan again to verify. No real-time playback required at any step. This sounds minor until you’re doing it across 12 files in a single session.
The DAW Is Still Doing Its Job
To be clear: I’m not advocating replacing your DAW. The DAW is doing exactly what it should be doing — tracking, editing, mixing, automation, plugin chains, recall. It’s the right tool for that part of the work. What I changed is where the handoff happens. The stereo mixdown leaves the DAW as a 24-bit WAV with a couple dB of headroom. Everything that happens after that point — noise reduction if needed, final EQ adjustments, normalization, loudness verification, export — happens in Sound Forge Pro. The two tools are not competing; they’re sequential. The practical effect of this separation is that I catch things I used to miss. Not because my ears got better, but because the environment changed. A fresh session, a different interface, different mental state. The file isn’t embedded in the mix session where I made all my emotional decisions. It’s just audio on a screen, and I can hear it more honestly.
What Actually Changes in a Dedicated Editor
The specific differences that matter for post-mix work: Waveform visibility. Sound Forge Pro’s default view shows the waveform at full resolution with no arrangement timeline, no track headers, no automation lanes cluttering the visual field. The entire screen is the audio. For finding edits, checking fade shapes, or spotting anomalies in a recording, this is faster. Destructive processing. This sounds like a limitation but for final mastering it’s a feature. When I apply normalization in Sound Forge, it applies to the file. There’s no question about whether plugin bypass is on or off, no render-versus-bounce confusion. What you hear in preview is what you get when you click OK. Export control. Exporting the final MP3 from Sound Forge Pro means explicitly setting bitrate, CBR or VBR, and sample rate in Format Settings before committing. There’s a default-bitrate trap if you use plain Save instead of Save As — it re-encodes at 256 kbps regardless of the source — but once you know about it the workflow is deliberate and fast. I know exactly what codec settings are applied to every file that leaves my machine.

The Honest Answer to “Is This Worth It”
It depends on what you’re delivering and how much you care about the last two percent. For quick demos, rough mixes for feedback, internal reference files — no, it’s not worth the extra step. Export from your DAW and move on. For anything going to a streaming platform, a client, a record label, a mastering engineer, a broadcaster — yes. The additional step of running a finished file through a dedicated editor
before it goes out costs maybe 10 minutes per track on a good day. The cost of delivering something with an audible artifact, a loudness spec violation, or a bitrate error is higher than that. I don’t think the DAW-for-everything approach is wrong. I did it for six years and shipped things I was proud of. I just think the dedicated editor approach is better, and the gap is most visible when the stakes are higher.


Comments (0)