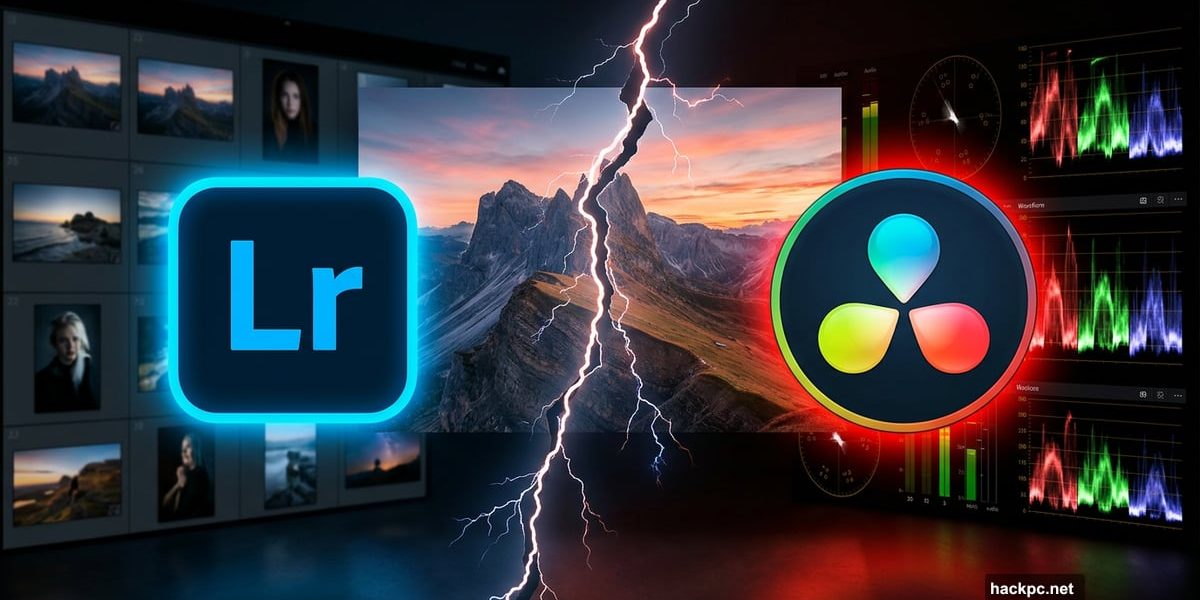
Adobe’s grip on photo editing has always felt inevitable. You pay the monthly subscription, you use Lightroom, you complain about the price, and then you pay again. But Blackmagic Design just dropped something that might actually change that calculation.
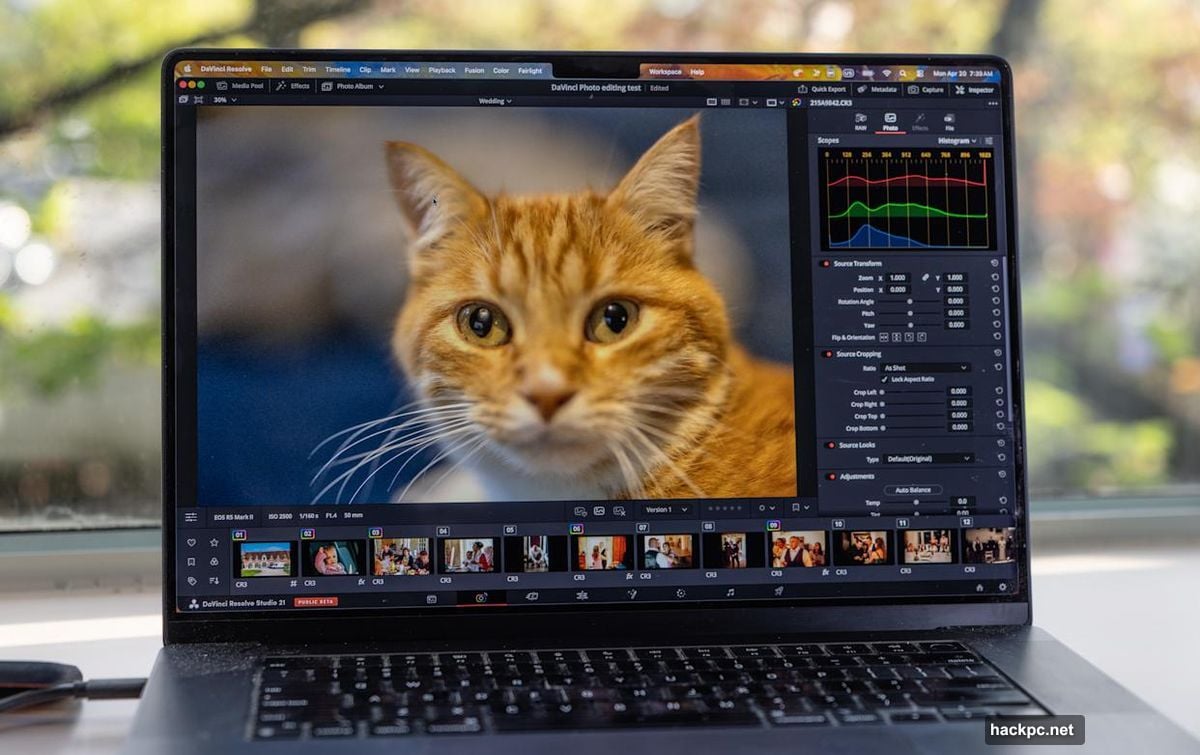
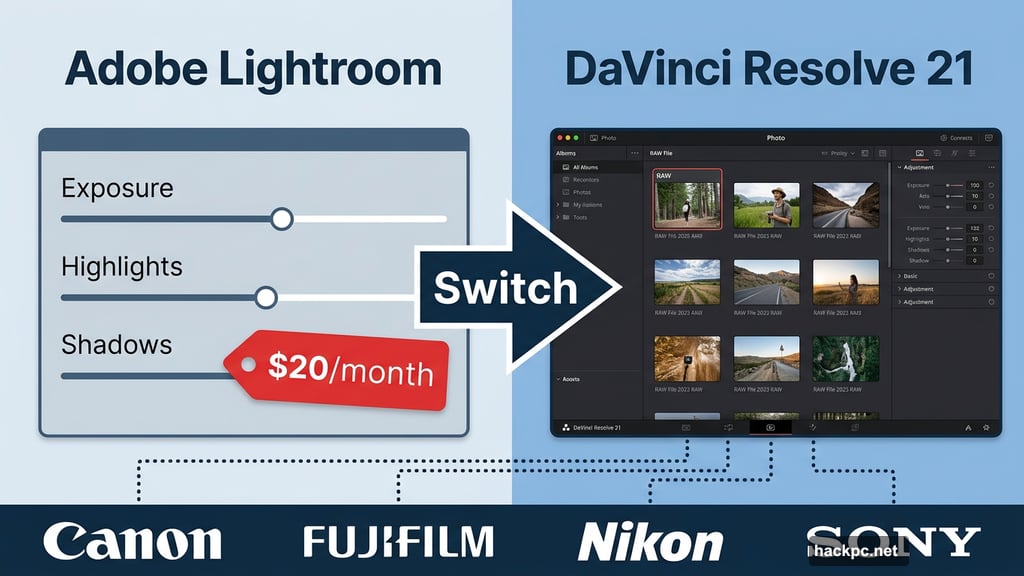
DaVinci Resolve 21 arrives in beta with a brand new Photo page — a dedicated photo editing workspace that brings Resolve’s legendary color grading tools directly to still images. For anyone paying Adobe’s $20 per month Photography subscription, that’s worth a serious look.
So the big question: can a video editing app built in the 1980s actually replace Lightroom in 2025? The short answer is yes, for some people. But the details matter a lot.
RAW Support and the New Photo Page
First things first — Resolve 21 now handles RAW files from Canon, Fujifilm, Nikon, and Sony, with more camera brands coming soon. Blackmagic has promised to add RAW support for new cameras shortly after release, just like Adobe does. Beyond RAW, it handles TIFFs, JPEGs, HEIFs, and other common photo formats too.
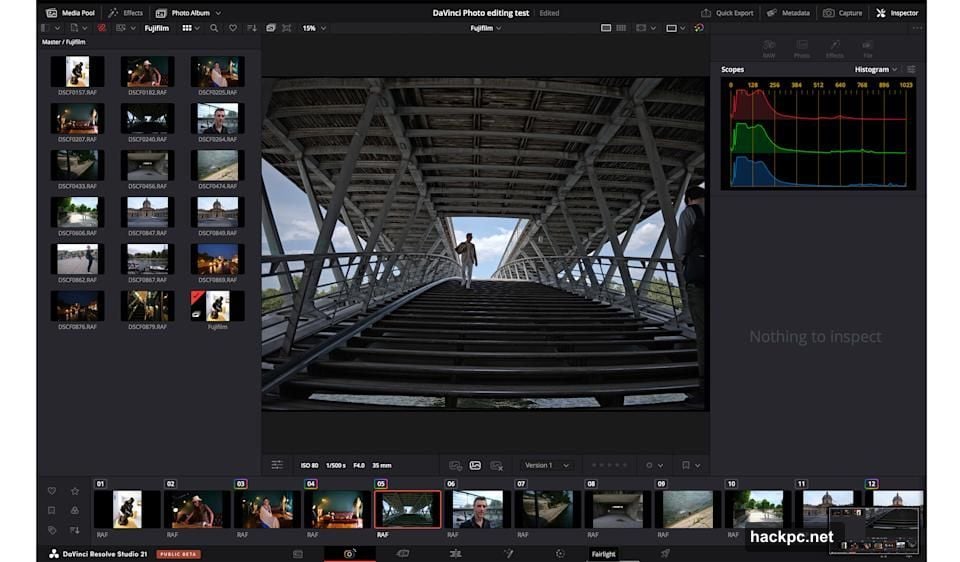
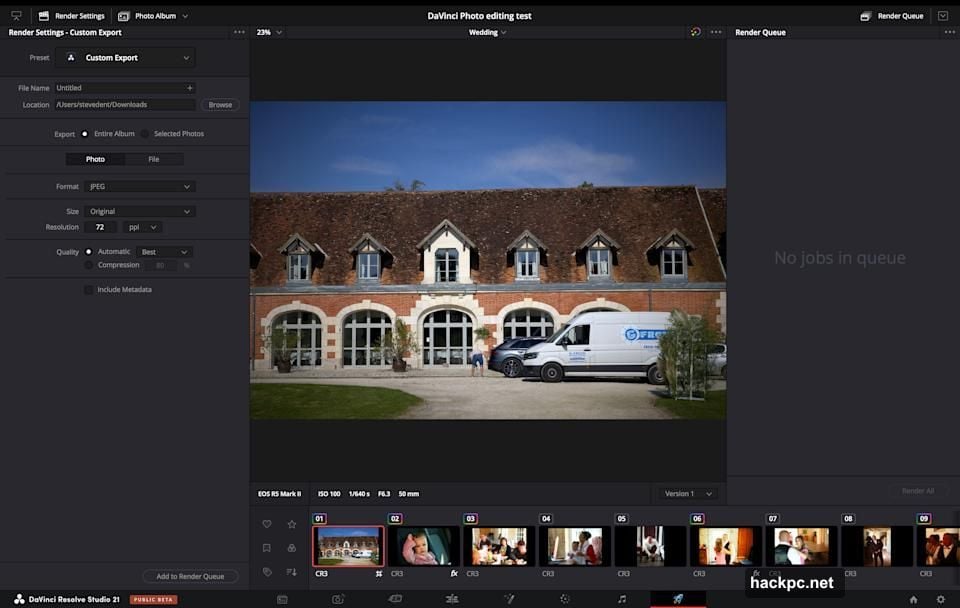
The new Photo page is where casual photographers will spend most of their time. You can import, organize, reframe, and crop images here. Basic RAW-style adjustments for exposure, highlights, and shadows are all accessible without leaving the page. Think of it as Lightroom’s Library and Basic develop panel rolled into one.
Organizing photos works through Resolve’s Project system, which functions like Lightroom’s Catalogs. Drag and drop photos or folders into the media pool, and you’re ready to go. The import workflow actually feels cleaner and faster than Lightroom’s — fewer steps, more logical flow. Plus, you can import an existing Lightroom catalog directly into Resolve if you’re considering making the switch.
Once imported, photos sort by file name, rating, color tags, and favorites. DaVinci Resolve Studio adds AI IntelliSearch on top of that, which lets you find photos by describing their content. Type “cats” or “dancing” and it visually identifies matching images. That’s genuinely clever.
Photos then move into Albums, Resolve’s equivalent of Lightroom Collections. Albums unlock photo-specific features across Resolve’s Color and Edit pages, making everything feel connected rather than bolted on.
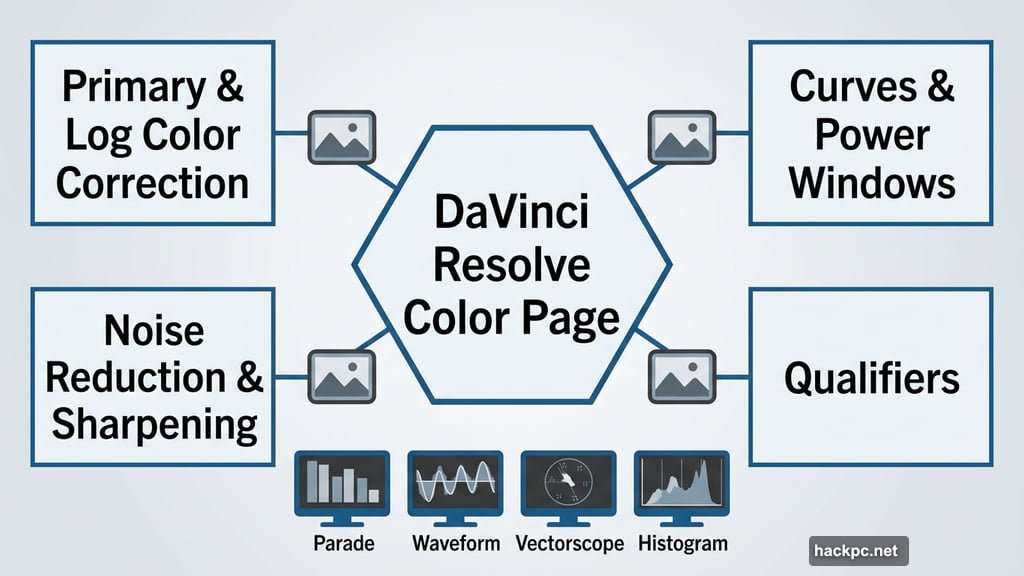
Color Grading Tools That Blow Lightroom Away
Here’s where Resolve absolutely earns its reputation. When you step into the Color page, the difference between Resolve and Lightroom becomes obvious fast.
Everything available for video editing applies to photos too. Primary and log color correction, curves, qualifiers, power windows, noise reduction, and sharpening — all of it works on still images. Resolve’s professional scopes, including parades, waveforms, vectorscopes, and histograms, give you precise visual feedback that Lightroom simply can’t match.
But the real standout is Resolve’s node-based workflow. Instead of applying adjustments in a linear stack like Lightroom does, you build a network of nodes in series or parallel. Want to apply one grade to your subject and a completely different treatment to the background? Easy. Want to save a complex multi-step grade and instantly apply it across an entire album? Done in seconds.
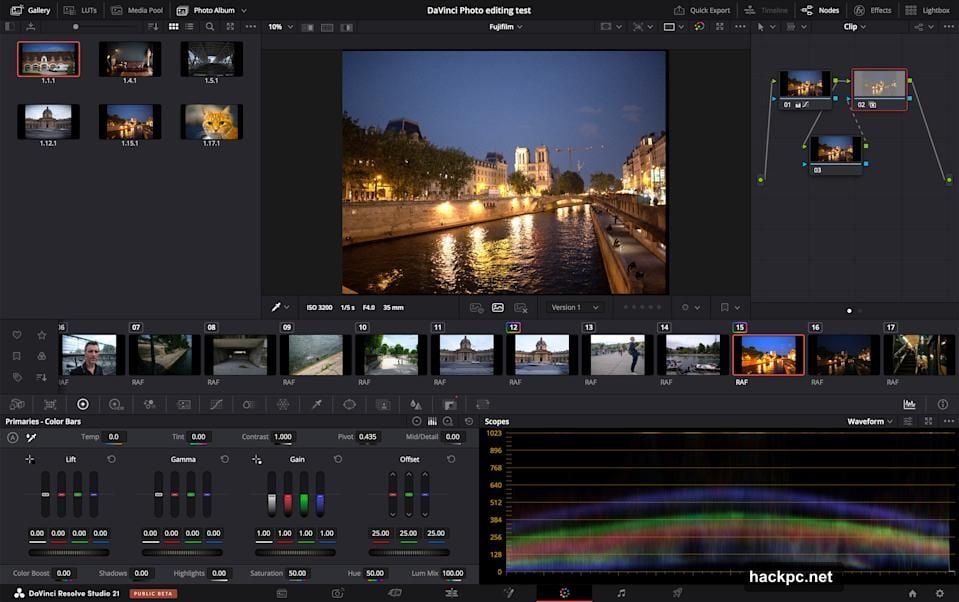
Resolve stores grades as “stills” — small visual thumbnails that show exactly what each grade looks like. The result is more intuitive and more powerful than Lightroom’s preset system. For anyone who works with color seriously, this alone might justify the switch.
Also available directly from the Photo page are Resolve’s full suite of filter effects: Vignette, Lens Blur, Film Damage, Look-Up Tables (LUTs), and the new Film Look Creator effect. DaVinci Resolve Studio adds AI-powered effects that go well beyond anything Lightroom offers natively. AI CineFocus, AI Face Age Transformer, and AI Ultrafocus are all built in. Lightroom users would need third-party plugins to get anywhere close to this level of creative control.
Fusion Page and Compositing Limitations
For users who want even more, the Fusion page enters the picture. Think of it as Resolve’s answer to Adobe After Effects. Warping, lights, Paint tools for Photoshop-style cloning, and the newly included Krokodove filters with text animation and warping all live here.
However, there’s an important limitation worth knowing upfront. The Photo page handles one image at a time. Multi-image compositing — the kind of work you’d normally do in Photoshop or After Effects — isn’t possible directly from Photo.
That said, there’s a workaround. After adjusting a RAW image, you can drop it into a video timeline where all your color grades and tweaks carry over intact. From there, stacking multiple images and using Resolve’s full compositing toolkit becomes possible through the Edit or Fusion pages. It works. But honestly, it’s clunky. Compared to doing the same thing in Photoshop, the process feels awkward and slow. This is clearly an area where Resolve still needs work.
Exporting Photos and Camera Tethering
Exporting finished images works two ways. Quick Export handles basic needs fast — file type, name, and resolution, nothing more. For more control, the Deliver page now includes dedicated photo functions when working with an Album. Size parameters, file type, resolution, and quality all live here.
But compared to Lightroom’s export panel, Resolve still falls short. Content credentials, watermarking, and post-processing options that photographers rely on simply aren’t there yet. For hobbyists, the current export tools work fine. For professionals with specific delivery requirements, this gap could be a dealbreaker.
One genuinely exciting new feature is Capture Live View for camera tethering. Connect a Canon or Sony camera via USB-C and control aperture, shutter speed, ISO, and exposure compensation directly from Resolve. You can view images live through Resolve’s professional scopes and tweak RAW settings like white balance, temperature, shadows, and highlights on the fly. Other camera brands aren’t supported yet, but Canon and Sony cover a massive portion of working photographers.
Who Should Actually Make the Switch
Resolve 21’s Photo page won’t replace Lightroom for everyone. But it doesn’t need to.
For video editors who occasionally shoot photos, this is probably everything you need and then some. You already know Resolve’s interface. The color tools are world-class. And you save $20 a month on Adobe’s subscription. That’s a pretty easy decision.
Hobbyists and enthusiasts who want powerful color grading tools without a recurring monthly fee have a genuinely compelling option here. The free version of DaVinci Resolve handles most photo tasks well, and the $295 Studio version includes lifetime updates with no ongoing costs. Compare that to Adobe’s subscription model and the math speaks for itself.
Professional photographers who’ve spent years building Lightroom workflows face a harder choice. Resolve’s organizational depth, export features, and pixel-level editing tools don’t match Lightroom yet. Switching would mean adapting to unfamiliar systems and giving up features you rely on daily. For now, patience makes more sense than an immediate jump.
The Photo page launched in beta just recently, and Blackmagic Design has a strong track record of rapid, meaningful updates. Many video editors made the switch from Adobe Premiere to Resolve years ago and never looked back. Given the ongoing frustration with Adobe’s subscription pricing, a similar migration from Lightroom feels increasingly plausible as Resolve matures.
If you’re curious, the free version costs nothing to try. Download it, import a few RAW files, and spend an afternoon in the Color page. You might be surprised how quickly it starts to feel like home.


Comments (0)